You can delay or schedule an email before sending it in Microsoft Outlook Online. This blog post shows how to schedule an email to submit at a later date and time. Also, how to navigate the Draft Folder to review scheduled emails.
Here several scenarios when to delay or schedule an email.
Submit an event details and login information days before event date
Working after hours and do not want others to know how late you were working
Completed an assignment earlier and want to remove it from your to do list
And my favorite, It’s on my mind now so take care of it now
You can watch the short video or review the step-by-step instructions below.
Delay or Schedule an Email Instructions
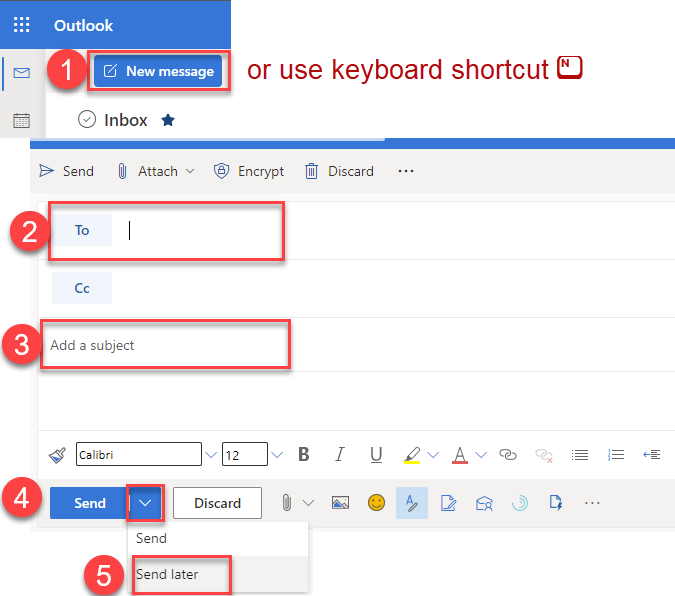
Log into your Outlook Online Account
Create a new email (Keyboard shortcut N)
Complete the To, Subject, and Body fields of the email
Scroll to the bottom of the email, click on the Send button drop-down, and select Send Later.
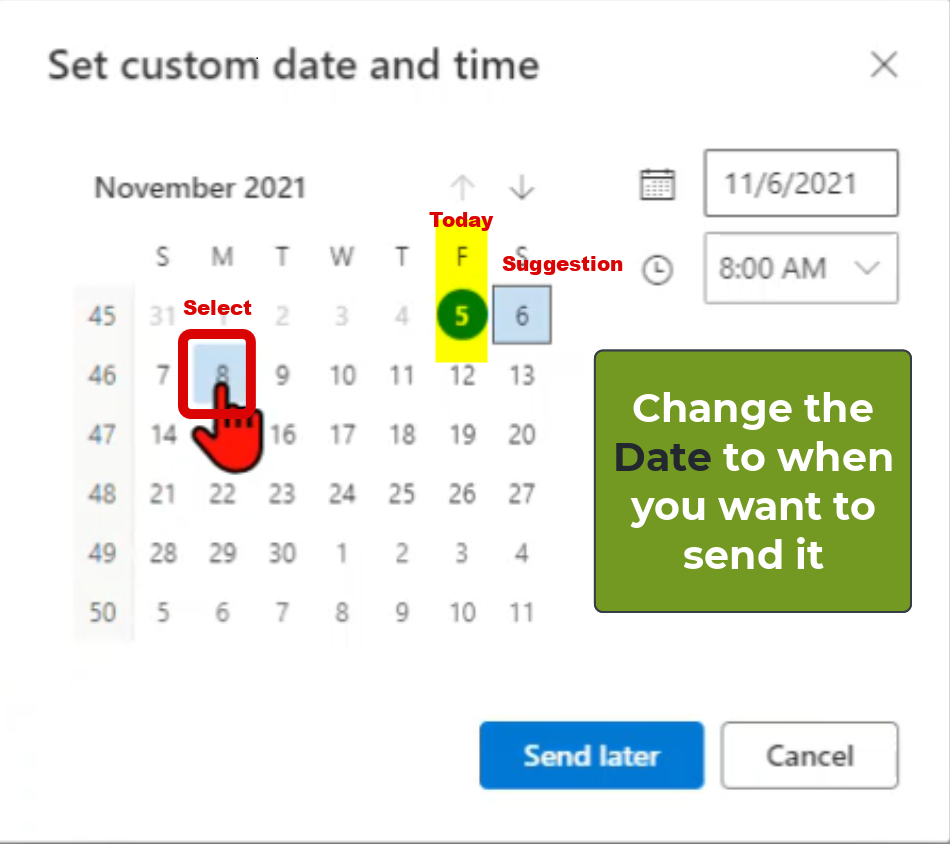
Once the custom date and time calendar appears, change the Date when you want to send the email
Notice the following: 1. Notice you can select the custom date from the calendar. 2. Today’s date is circled. 3. Suggested date is boxed.
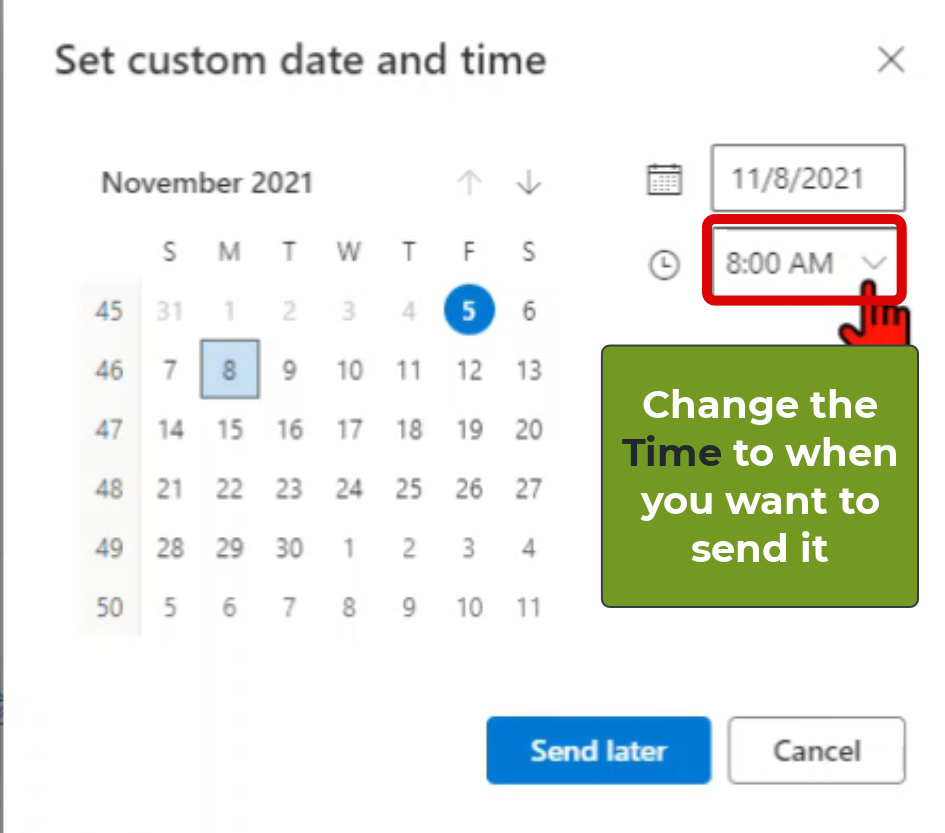
Next, select what Time you want to send the email
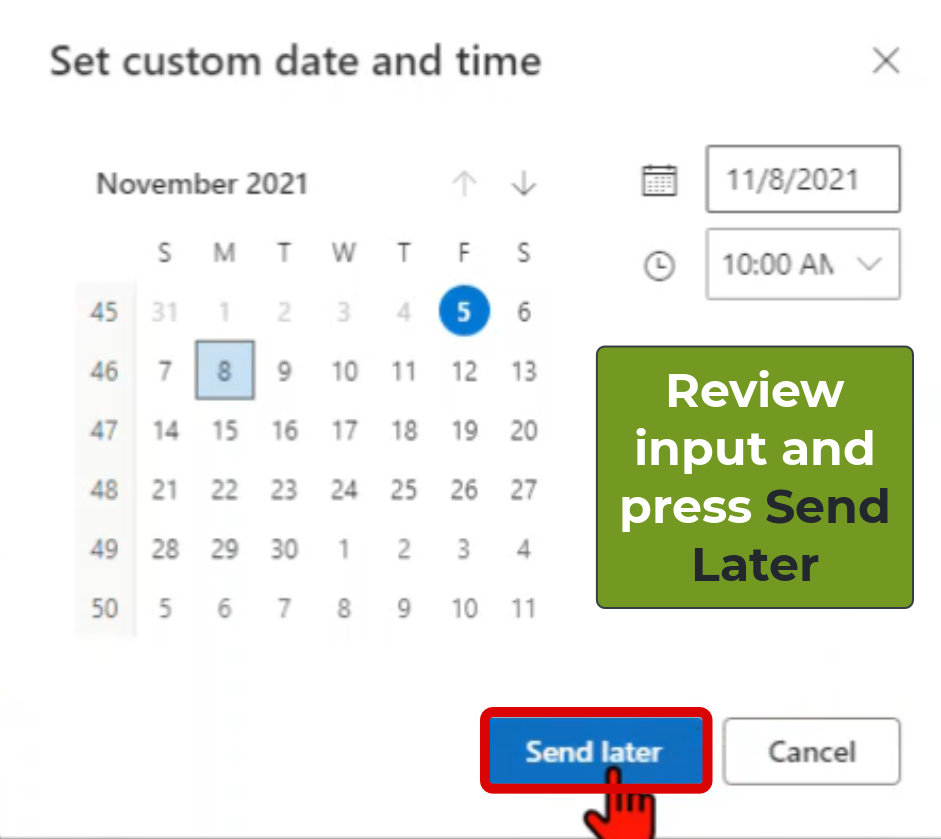
Finally, review your entry and press Send Later
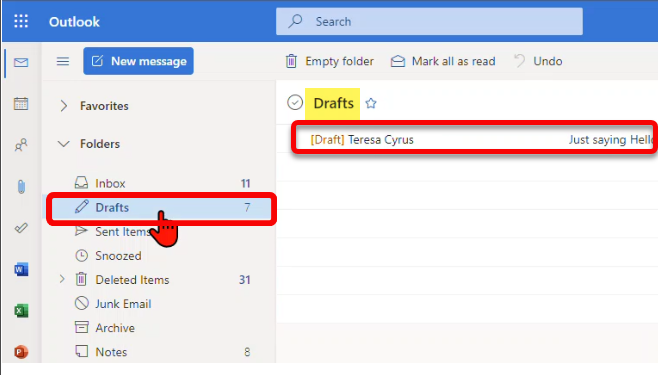
Navigate to the Draft Folder
You may need to expand Folders from the Quick access navigation
Locate the Drafts folder to locate your scheduled email and any other emails that you have not sent yet