Many times, an email from an external and trusted sender ends up in the Junk folder. A young lady called frantically for a solution, for she had missed an interview. The meeting details were sitting in her Junk folder for several days. So, the most apparent response is to add trusted senders to an Outlook Safe Sender List so emails don’t end in the Junk Folder.
Often Outlook users are unaware that you can block a sender. Messages with this label go directly to the Junk folder. And oppositely, you can identify authorized senders to remain in the Inbox.
A couple of options exist to ensure all credible senders’ webmail stays in the Inbox as a safe sender.
Approve anyone in the contacts
Add an address or domain to a Safe Sender List
This provision is unnecessary for any senders within a company’s active directory.
This blog instructs how to add trustworthy messages to a Safe Sender in Outlook using two methods. A separate blog post covers the overview of What is Junk Email?, Block Sender, and Phishing.,
How to Add Contacts as an Outlook Safe Sender?
Outlook needs a one-time setup to perform the Safe Sender function.
Navigate to the Outlook Online application and sign in. (Already logged in, skip this step.)
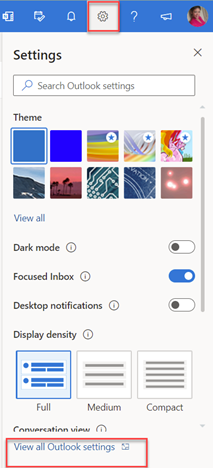
Click on the Settings icon from the top menu, then scroll to the bottom of the screen and select the View all Outlook Settings.
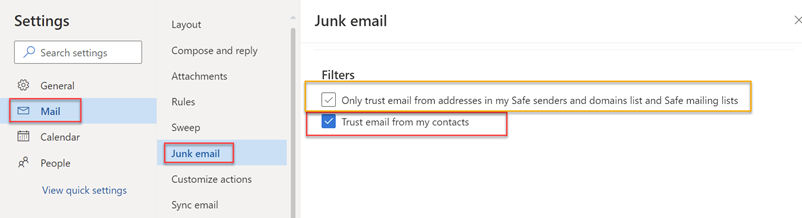
Select Mail, then click on Junk Email
Scroll to the bottom of the screen to the Filters section, click on Trust from my contacts (recommended).
Before selecting Only trust email from addresses in My Safe Sender list, understanding the behaviors is crucial. This option allows only trustworthy sources from this list, and all other emails will go to the Junk folder. So, choose wisely. (In the image below, I enclosed this choice within a yellow box.)
Next, add an individual to the Contacts. Although there are many ways to add a person to the contacts, the instructions below is one approach.
Navigate to the Outlook Online application and sign in. (Already logged in, then skip this step.)
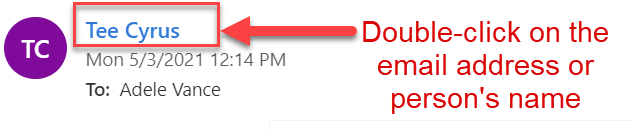
Open the email from the trusted sender, then double-click on the email address or person’s name
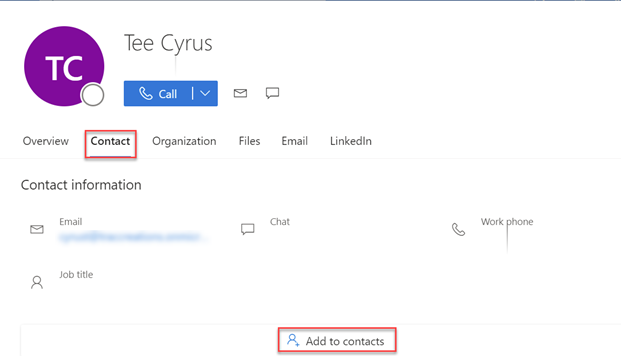
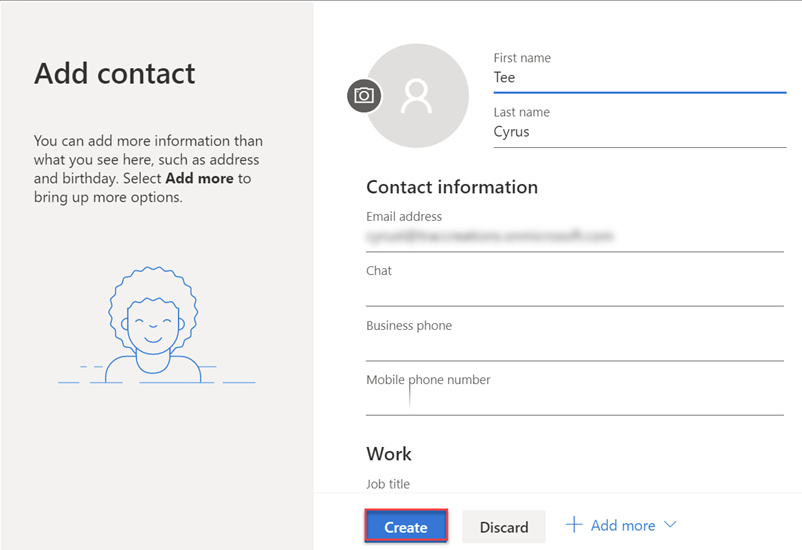
From the contact card, click on the second tab, Contact, then select Add to Contacts.
The Add contact card populates the name and address fields. Do not worry about updating the form’s remaining items like the home or mobile numbers. For now, select Create.
This user will no longer move to the Junk folder.
How to Add an individual or domain to the Safe Sender List?
This method adds a single-user or domain when the recipient does not want to incorporate a sender in the Contacts but only to the safe list.
Navigate to Outlook Application and sign in. (Already logged in, skip this step.)
Click on the Settings icon from the top menu, then scroll to the bottom of the screen and select the View all Outlook Settings.
Select Mail | Junk Email
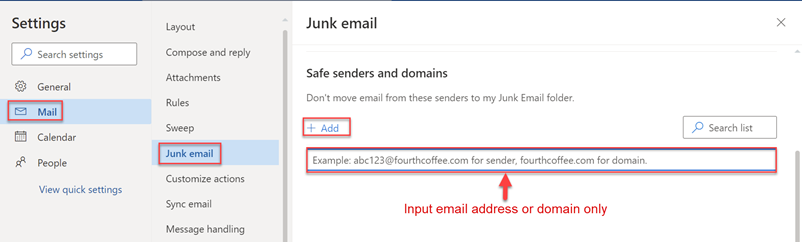
Scroll to the midsection of the screen to the Safe senders and domain section, click on the +Add.
For an individual, input the FullEmail Address and press Enter.
For all email alias with an exact hostname, input the Domain only and press Enter.
Scroll to the bottom of the screen, click on the Save button, then press X to close properties.
How to Modify or Remove a person from the Safe Sender List?
The Junk Email Rules store all accepted senders in the settings. To modify the status, follow the steps below.
Navigate to Outlook Application and sign in. (Already logged in, skip this step.)
Click on the Settings icon and select View all Outlook Settings
Select Mail | Junk Email
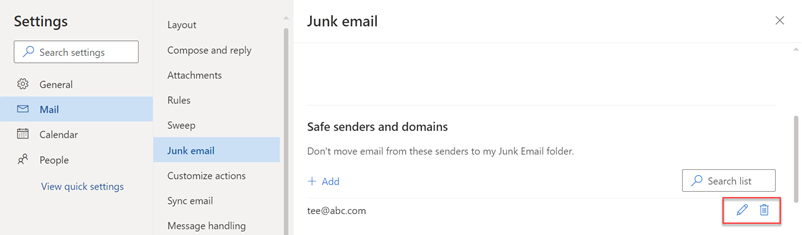
Under the Safe senders and domains area, locate the email to update. Do not be alarmed by a lengthy list; it represents proper Inbox management, so paste the address in the designated search bar.
Click on the Pencil icon to edit or the Trash can icon to delete the sender from the list.
Scroll to the bottom of the screen, click on the Save button, then press X to close properties.
The 4E Takeaway
As you can see, adding a person to the Outlook Safe Sender list can prevent missing vital emails marked as Spam. You can enable these settings for messages from doctor’s offices, external appointments, opt-in subscriptions, and much more.