Microsoft 365 improves Outlook Exchange Online calendar sharing experience. These updates provide permission consistency, shared calendar invitation acceptance, and instant syncing to all devices. Previously, only Outlook Online had these features. Now the Outlook Desktop application has them too.
To receive these enriched features, you must enable the settings in Outlook Desktop. I will cover the steps later in the post. First off, let’s cover the Who and the What before the How.
Who will get the Exchange Shared Calendar updates?
These enhancements are available to monthly and annual Microsoft 365 subscribers only. The on-premise versions (Outlook Exchange 2010, 2013, or 2016) will not get these updates. I like to reference on-premise as “one purchase, one download, one license).”
Specifically, the PC users with version 2103 or higher. (Learn how to check your current PC version.) And, Mac users will get these changes starting in version 16.23.326.1.
What do the Exchange Shared Calendar updates include?
Permission Levels
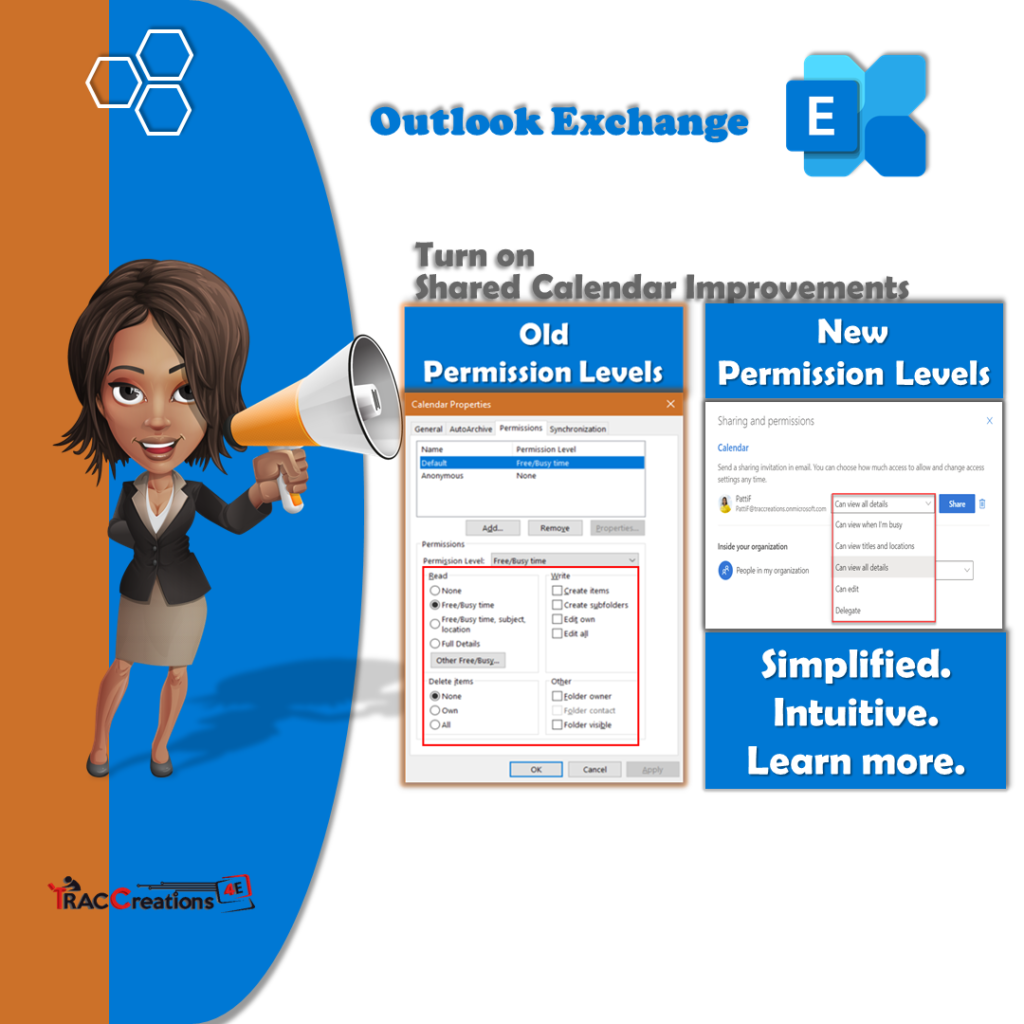
The most significant change is the permission levels. The image below is the legacy Outlook Exchange permissions. These permissions were complex, and quite frankly, they scared the heck out of some users from sharing a calendar. No one wanted the risk of exposing confidential information.
Check out the second image. You now have only six access choices compared to 14. The new permission levels are less involved and more intuitive. That’s a huge difference! Thanks, Microsoft.
The table below summarizes what the recipient has access to in the new model calendar sharing permissions.
Access Level
Description
Can view all details
Able to see the title, participants, date, location, description, and attachments
Can view when I’m busy
Able to see your availability only without any other details. Note: Most often, this setting defaults to all users within an organization.
Can view titles and location
Unable to view any other details except for the event’s title and location
Can edit
Able to edit, cancel, and update all event’s fields
Delegate
Able to view, modify, create, delete and respond to meeting requests on your behalf. Note: Must choose to allow viewing of private events
Shared calendar invitation acceptance
The shared calendar invitation acceptance feature is new to the Outlook Desktop. Ultimately, when the calendar owner shares a calendar with a person, the recipient will get a shared calendar invitation. The recipient reviews the details and accepts the invitation.
Currently, the recipient will not be informed when the permission levels are removed or adjusted.
Syncing to all Devices
Preceding this application upgrade, syncing the shared calendars was vastly problematic. For example, the Outlook Exchange sharing experience would infrequently scan for revisions and update accordingly. In comparison, Outlook Online immediately syncs any changes made to the shared calendar.
But there are few limitations. With the upgrade, both applications sync instantaneously as long as they are in the same Microsoft 365 tenant or the free version of Outlook.com. And, for external tenants, syncing occurs every three hours. Lastly, third-party services like Gmail or Yahoo, take even longer with synchronization at 24 to 48 hours.
Nevertheless, this upgrade is a substantial improvement now that both applications show the same content.
How to Enable the Shared Calendar New Experience?
You can enable and disable this setting at any time. You can read the how-to guide below or watch the short YouTube video.
Ensure you have the latest version of Outlook. Click here for the PC instructions.
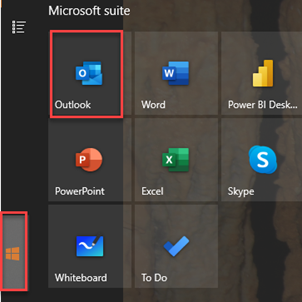
Click on the Windows icon and select Outlook. As shown in the image below.
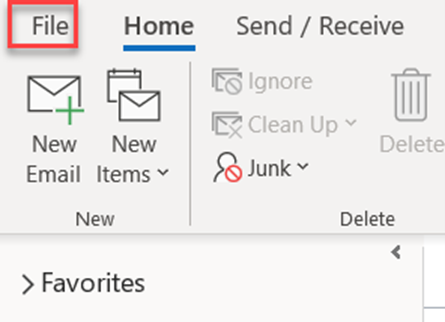
While in your email account, from the top menu, click on File.
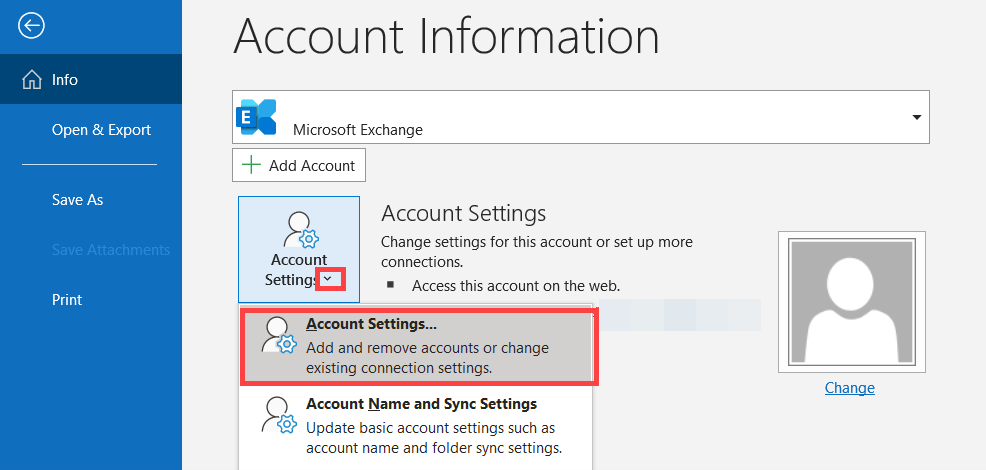
Your account information will appear. Click on the Account Settings dropdown menu and select Account Settings.
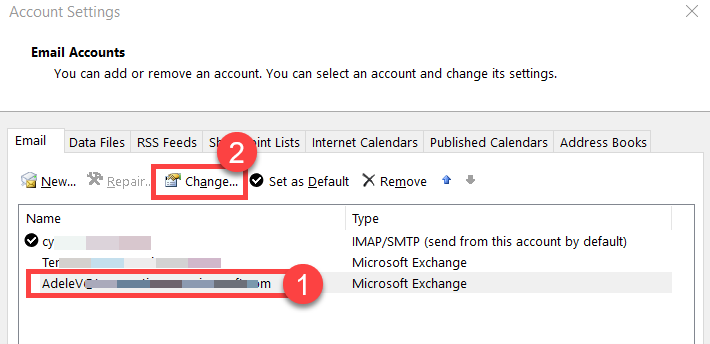
As shown in the example image below, click on the desired Name for the Microsoft Exchange or IMAP/SMTP account if you have multiple email accounts. Then select Change.
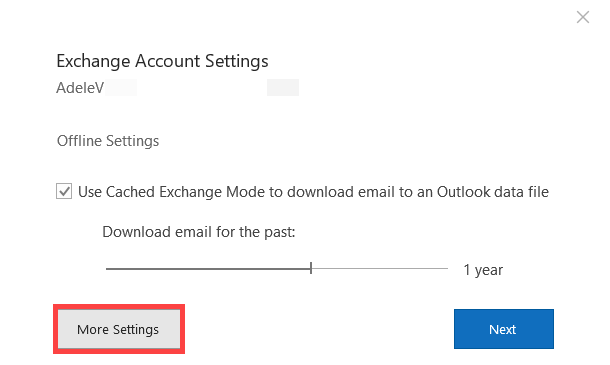
From the Exchange Account Setting, select More Settings.
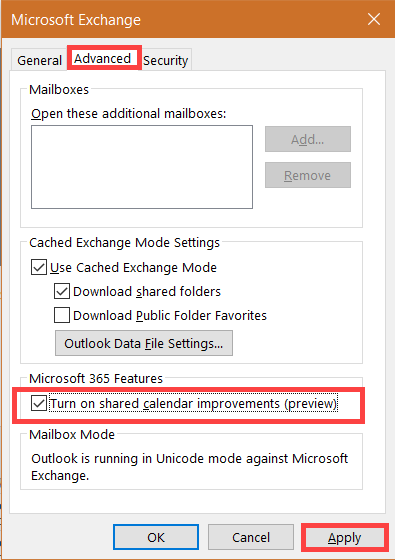
Next, select the Advanced tab and check the box by Turn on shared calendar improvements (preview). Note: Some users may see “preview” next to this feature to indicate the upgrade is available. Microsoft is rolling this feature out in phases. When all clients receive this upgrade, this notation is removed from the properties.
Click on Apply.
For any reason you want to revert to the old permission levels, repeat the steps above and deselect this option.
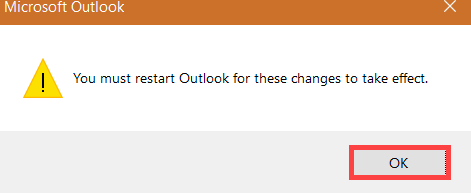
Important. Read this paragraph before taking further action. You will receive a confirmation to restart your computer for the changes to take effect as shown in the image below. Tip: If you have multiple Exchange accounts, repeat the above steps before closing and shutting down your computer. Also, I noticed that I had to hit the X to close out each screen.
How to handle the existing shared calendar in Microsoft Exchange after the upgrade?
In summary, you must delete the shared calendars only, close and restart Outlook, and add the calendar. As a tip, write down the name of the calendar before implementing these steps.
Navigate to Outlook Calendar
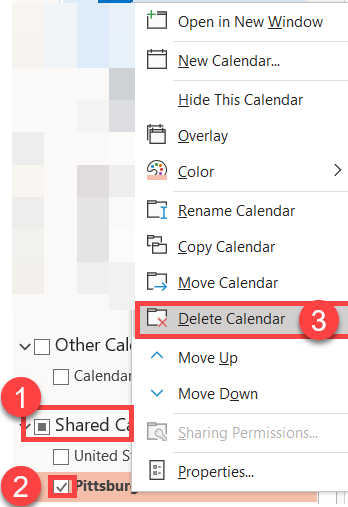
In the left navigation, scroll down to the Shared Calendar area and right-click on the desired calendar. Choose Delete Calendar. (No worries, you are not permanently deleting this calendar.) Repeat this step for each shared calendar.
Close and restart the application.
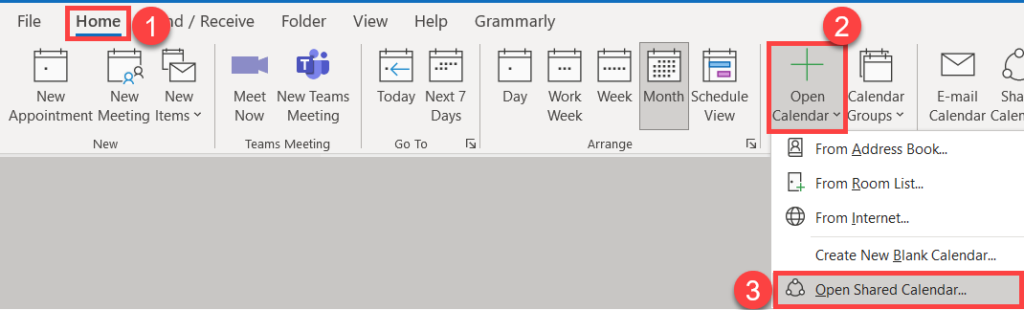
Now, let’s add the shared calendar to our calendar. From the Home menu, click on the dropdown for Open Calendar and select Open Shared Calendar.
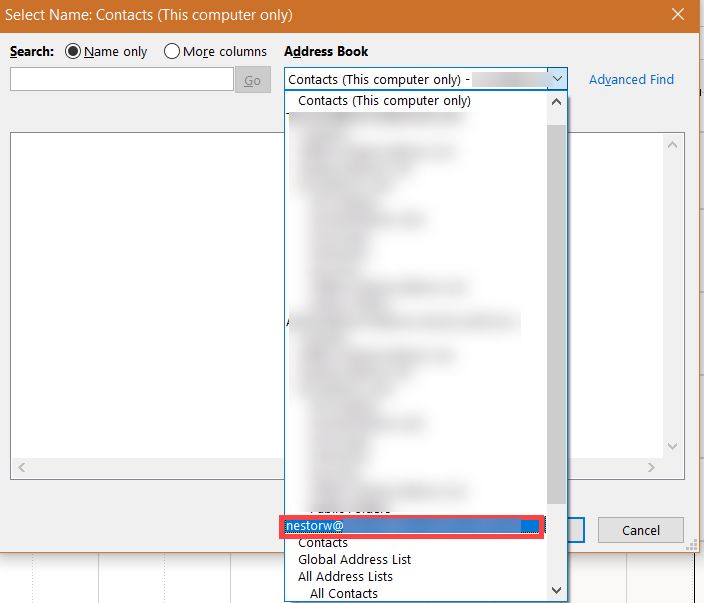
Click on the Name button, and search and click on the person’s name.
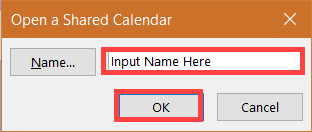
If the name does not appear, which it didn’t for me, input the name in the second box. Press OK.
The shared calendar will appear in the left navigation under the Shared Calendar area. You have completed the upgrade.
The 4E Takeaway
If you are like me, I may work in both Outlook Desktop and Outlook Online applications. It is nice when both applications contains the same features. It prevents confusion and switching between applications. And, let me know what your thoughts are about the Exchange Shared Calendar’s improvements.